Custom Board Editor Interface Guide
From Card Hunter Wiki
(Difference between revisions)
| Line 23: | Line 23: | ||
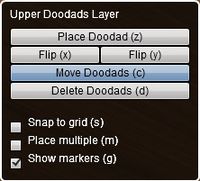
| STYLE="vertical-align: center; text-align:justify;" align="left" width="35%" |'''Upper Doodads Layer Menu''' | | STYLE="vertical-align: center; text-align:justify;" align="left" width="35%" |'''Upper Doodads Layer Menu''' | ||
* Set where the dead chars go. If you don't set any, they just fly off the table. | * Set where the dead chars go. If you don't set any, they just fly off the table. | ||
| − | * <span style="color: orange">'''Place Doodad'''</span>: ''opens marker palette for selection'' | + | * <span style="color: orange">'''Place Doodad'''</span>: ''opens marker palette for selection. Toggle 'z' to close.'' |
* <span style="color: orange">'''Flip'''</span>: ''flips the orientation of the upper doodad'' | * <span style="color: orange">'''Flip'''</span>: ''flips the orientation of the upper doodad'' | ||
* <span style="color: orange">'''Move Doodads'''</span>: ''moves doodads, duh !'' | * <span style="color: orange">'''Move Doodads'''</span>: ''moves doodads, duh !'' | ||
| Line 47: | Line 47: | ||
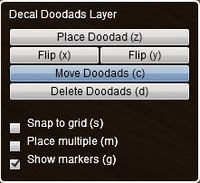
| STYLE="vertical-align: center; text-align:justify;" align="left" width="35%" |'''Decal Doodads Menu''' | | STYLE="vertical-align: center; text-align:justify;" align="left" width="35%" |'''Decal Doodads Menu''' | ||
* This is where you mark Difficult and Victory terrain, add non-wall Blocked terrain (like pillars and bushes), and generally make the board look pretty. Also where you add all the junk sitting on the table. Decals can be piled on top of each other. | * This is where you mark Difficult and Victory terrain, add non-wall Blocked terrain (like pillars and bushes), and generally make the board look pretty. Also where you add all the junk sitting on the table. Decals can be piled on top of each other. | ||
| − | * <span style="color: orange">'''Place Doodad'''</span>: ''opens decal palettes for selection'' | + | * <span style="color: orange">'''Place Doodad'''</span>: ''opens decal palettes for selection. Toggle 'z' to close.'' |
* <span style="color: orange">'''Flip'''</span>: ''flips the orientation of the decal'' | * <span style="color: orange">'''Flip'''</span>: ''flips the orientation of the decal'' | ||
* <span style="color: orange">'''Move Doodads'''</span>: ''moves decal, duh !'' | * <span style="color: orange">'''Move Doodads'''</span>: ''moves decal, duh !'' | ||
| Line 58: | Line 58: | ||
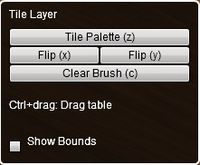
| STYLE="vertical-align: center; text-align:justify;" align="left" width="35%" |'''Tile Layer Menu''' | | STYLE="vertical-align: center; text-align:justify;" align="left" width="35%" |'''Tile Layer Menu''' | ||
* This is where you usually start drawing your board. This is base of your map: floors, walls, water; most other stuff will be added as decals. | * This is where you usually start drawing your board. This is base of your map: floors, walls, water; most other stuff will be added as decals. | ||
| − | * <span style="color: orange">'''Tile Palette'''</span>: ''select a tile from a variety of palettes. Each tile has a default terrain, but you can override that in the terrain layer.'' | + | * <span style="color: orange">'''Tile Palette'''</span>: ''select a tile from a variety of palettes. Each tile has a default terrain, but you can override that in the terrain layer. Toggle 'z' to close.'' |
* <span style="color: orange">'''Flip'''</span>: ''flip the tile's orientation.'' | * <span style="color: orange">'''Flip'''</span>: ''flip the tile's orientation.'' | ||
* <span style="color: orange">'''Clear Brush'''</span>: ''stop drawing with the current tile.'' | * <span style="color: orange">'''Clear Brush'''</span>: ''stop drawing with the current tile.'' | ||
| Line 66: | Line 66: | ||
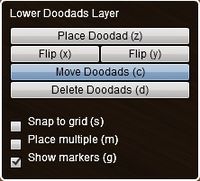
| STYLE="vertical-align: center; text-align:justify;" align="left" width="35%" |'''Lower Doodads Menu''' | | STYLE="vertical-align: center; text-align:justify;" align="left" width="35%" |'''Lower Doodads Menu''' | ||
* Graphics you put around the edges of the board to give it thickness. Two styles to choose from, usually one of the last things you add to the board. | * Graphics you put around the edges of the board to give it thickness. Two styles to choose from, usually one of the last things you add to the board. | ||
| − | * <span style="color: orange">'''Place Doodad'''</span>: ''opens doodad palettes for selection'' | + | * <span style="color: orange">'''Place Doodad'''</span>: ''opens doodad palettes for selection. Toggle 'z' to close.'' |
* <span style="color: orange">'''Flip'''</span>: ''flips the orientation of the doodad'' | * <span style="color: orange">'''Flip'''</span>: ''flips the orientation of the doodad'' | ||
* <span style="color: orange">'''Move Doodads'''</span>: ''moves doodad, duh !'' | * <span style="color: orange">'''Move Doodads'''</span>: ''moves doodad, duh !'' | ||
Latest revision as of 23:54, 3 September 2013
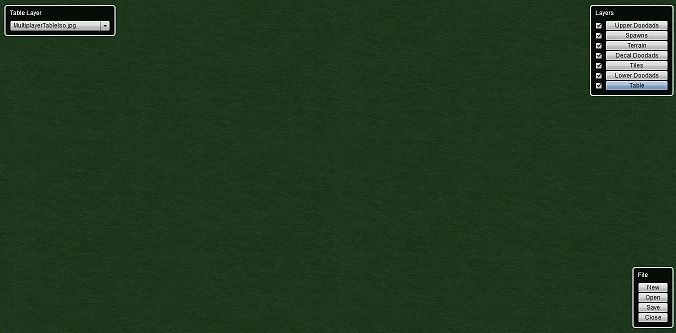
This guide presents the user interface of the Custom Board Editor. Custom scenarios are a feature of the Card Hunter game universe. Players are given free rein to design custom game boards with the board editor and setup scenarios to enjoy stress free tabletop-like games with friends or other players. You can play with your own multiplayer party or take on the role of monsters. Make escort missions or King of the Hill battle scenarios. Decimate countless mob waves or survive single character challenges. As of writing, custom scenarios support only single player vs AI and single player vs single player custom games. Readers are advised to browse A Tutorial to making custom scenarios as a prelude.
Custom Board Editor Screenshot
File Menu
|
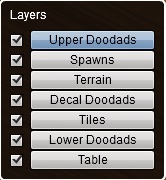
Layers Menu
|
|||
Upper Doodads Layer Menu
|
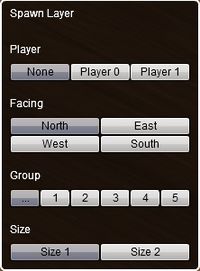
Spawn Layer Menu
|
|||
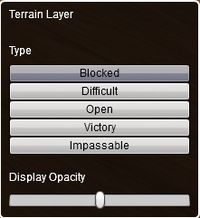
Terrain Layer Menu
|
Decal Doodads Menu
|
|||
Tile Layer Menu
|
Lower Doodads Menu
|
|||
Table Layer Menu
|
