This guide presents the user interface of the Custom Board Editor. Custom scenarios are a feature of the Card Hunter game universe. Players are given free rein to design custom game boards with the board editor and setup scenarios to enjoy stress free tabletop-like games with friends or other players. You can play with your own multiplayer party or take on the role of monsters. Make escort missions or King of the Hill battle scenarios. Decimate countless mob waves or survive single character challenges. As of writing, custom scenarios support only single player vs AI and single player vs single player custom games. Readers are advised to browse A Tutorial to making custom scenarios as a prelude.
Custom Board Editor Screenshot
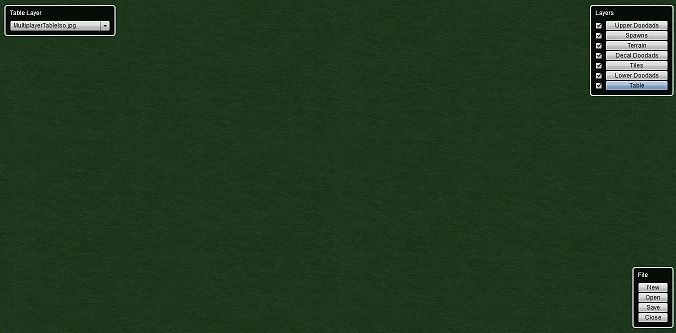
Custom Board Editor User Interface
File Menu
- New: discard current board.
- Open: load board file (.brd).
- Save: save current board.
- Close: discard changes and return to Multiplayer lobby (not the scenario editor).
|
|
|
Layers Menu
- Board details are saved in 7 layers, drawn from the bottom up. This menu has check boxes to select which ones are visible while you're editing (when playing a board, only the bottom four are visible) and buttons to select which layer you want to edit.
|
|
Upper Doodads Menu
- Set where the dead chars go. If you don't set any, they just fly off the table.
- Place Doodad: select which dead char marker to place; I'm not sure what the numbers mean
- Flip (x) / Flip (y): flips the orientation of the upper doodad
- Move Doodads:
- Delete Doodads
- [] Snap to grid
- [] Place multiple
- [] Show markers: you usually have to uncheck this then re-check it to see these markers, which is probably a bug
|
|
|
Spawn Layer Menu
- Player: None (delete spawn), Player 0 (red, you), Player 1 (blue, opponent)
- Facing: Sets orientation of the spawn unit.
- Group: "..." is "any group", often used for player's party; other numbers match group numbers in scenario editor.
- Size: for small (1x1) and large (2x) figures; assigning a small figure to a large spawn will place it on the bottom tile.
|
|
Credits


