The Wizard's Workshop
From Card Hunter Wiki
(Difference between revisions)
(screenshot + description update, removed the deleted scenario) |
|||
| Line 1: | Line 1: | ||
{{Adventurepage | {{Adventurepage | ||
| name={{PAGENAME}} | | name={{PAGENAME}} | ||
| − | | num_scenarios= | + | | num_scenarios=3 |
| level=2 | | level=2 | ||
| splash_screen=Wizard's Workshop.jpg | | splash_screen=Wizard's Workshop.jpg | ||
| Line 14: | Line 14: | ||
| number=1 | | number=1 | ||
| title=Workshop Level 1 | | title=Workshop Level 1 | ||
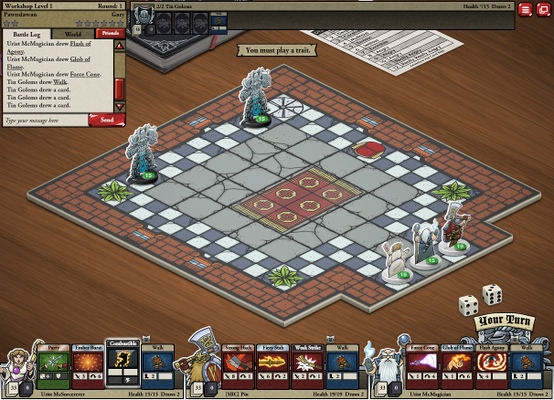
| − | | pre_description=Aloyzo's tower is neat and well-furnished. The wizard is an enthusiastic horticulturalist and he has placed magnificent ficus trees in the corners of this room. As you step inside the tower, two | + | | pre_description=Aloyzo's tower is neat and well-furnished. The wizard is an enthusiastic horticulturalist and he has placed magnificent ficus trees in the corners of this room. As you step inside the tower, two Tin Golems whir into life and lurch towards you with murderous intent! |
| − | | post_description=The once elegant room is now ruined. The | + | | post_description=The once elegant room is now ruined. The Golems have been reduced to piles of scrap metal amongst the debris of fine decor. You leave the piles of scrap metal for Aloyzo to clean up, and climb to the second tower level. |
| − | | raw_map=The Wizards Workshop Part1 Map. | + | | raw_map=The Wizards Workshop Part1 Map.jpg |
| victory_stars=2 | | victory_stars=2 | ||
| loss_stars=6 | | loss_stars=6 | ||
| Line 27: | Line 27: | ||
| number=2 | | number=2 | ||
| title=Workshop Level 2 | | title=Workshop Level 2 | ||
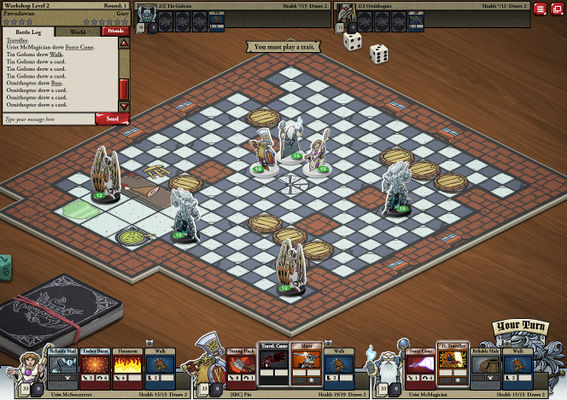
| − | + | | pre_description=The second floor of Aloyzo's tower is a kitchen. Two more Tin Golems defend this area, this time accompanied by a pair of Ornithopters. You shudder at the madness of it. Living machines! What was Aloyzo doing? | |
| − | + | ||
| − | + | ||
| − | + | ||
| − | + | ||
| − | + | ||
| − | + | ||
| − | + | ||
| − | + | ||
| − | + | ||
| − | + | ||
| − | + | ||
| − | | pre_description=The | + | |
| post_description=The fight destroys the kitchen and much of its contents. You that all this is worth it to the errant wizard. You can now climb to the last level of the tower and secure it from it's artificially animated assailants. | | post_description=The fight destroys the kitchen and much of its contents. You that all this is worth it to the errant wizard. You can now climb to the last level of the tower and secure it from it's artificially animated assailants. | ||
| − | | raw_map=The Wizards Workshop | + | | raw_map=The Wizards Workshop Part2 Map.jpg |
| victory_stars=4 | | victory_stars=4 | ||
| loss_stars=6 | | loss_stars=6 | ||
| Line 49: | Line 37: | ||
| mob2_quantity=2 | | mob2_quantity=2 | ||
}} | }} | ||
| − | | | + | | scenario3= |
{{Scenario | {{Scenario | ||
| − | | number= | + | | number=3 |
| title=Workshop Apex | | title=Workshop Apex | ||
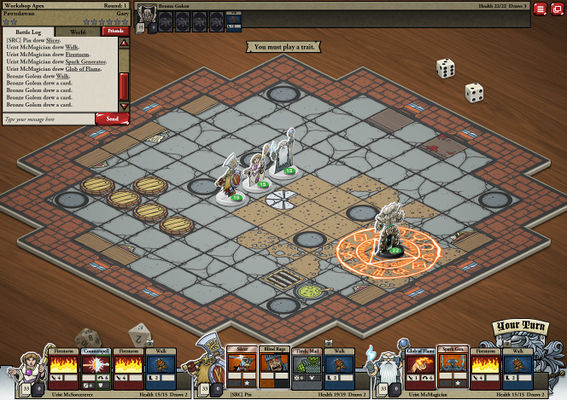
| − | | pre_description=At the tower's apex is Aloyzo's master laboratory. | + | | pre_description=At the tower's apex is Aloyzo's master laboratory. The walls are lined with shelves of herbs, unguents and potions. This room is guarded by an enormous Bronze Golem. This mechanical monstrosity s a threat to magic, living creatures and the Cardhuntrian way of life. It must be smashed to pieces! |
| post_description=The final battle destroys the laboratory completely. Both Aloyzo the wizard and local authorities are grateful for the player's successful efforts. With a sigh, Aloyzo swears a solemn oath never to dabble in the dark arts of technology again. He rewards you with what he can salvage from his ruined lab and pledges to assist you in your further adventures whenever he can. | | post_description=The final battle destroys the laboratory completely. Both Aloyzo the wizard and local authorities are grateful for the player's successful efforts. With a sigh, Aloyzo swears a solemn oath never to dabble in the dark arts of technology again. He rewards you with what he can salvage from his ruined lab and pledges to assist you in your further adventures whenever he can. | ||
| − | | raw_map=The Wizards Workshop | + | | raw_map=The Wizards Workshop Part3 Map.jpg |
| − | | victory_stars= | + | | victory_stars=2 |
| loss_stars=6 | | loss_stars=6 | ||
| mob1=[[Bronze Golem|Bronze Golem]] | | mob1=[[Bronze Golem|Bronze Golem]] | ||
| mob1_quantity=1 | | mob1_quantity=1 | ||
| − | |||
| − | |||
}} | }} | ||
}} | }} | ||
Latest revision as of 03:45, 5 August 2015
| Number of Scenarios | 3 |
| Quests | |
| |
| Unlocked By | |
| White Skull Canyon | |
| Unlocks | |
| Chest and Barrel | |
[edit] Part 1 - Workshop Level 1
| Win/Loss | ||||
|---|---|---|---|---|
| Victory Stars | Loss Stars | |||
| 2 | 6 | |||
| Enemies | Quantity | |||
| Tin Golems | 2 | |||
| Pre-Battle Description | ||||
| Aloyzo's tower is neat and well-furnished. The wizard is an enthusiastic horticulturalist and he has placed magnificent ficus trees in the corners of this room. As you step inside the tower, two Tin Golems whir into life and lurch towards you with murderous intent! | ||||
| Post-Battle Description | ||||
| The once elegant room is now ruined. The Golems have been reduced to piles of scrap metal amongst the debris of fine decor. You leave the piles of scrap metal for Aloyzo to clean up, and climb to the second tower level. | ||||
| Hints | ||||
| ||||
[edit] Part 2 - Workshop Level 2
| Win/Loss | |||
|---|---|---|---|
| Victory Stars | Loss Stars | ||
| 4 | 6 | ||
| Enemies | Quantity | ||
| Tin Golems | 2 | ||
| Ornithopter | 2 | ||
| Pre-Battle Description | |||
| The second floor of Aloyzo's tower is a kitchen. Two more Tin Golems defend this area, this time accompanied by a pair of Ornithopters. You shudder at the madness of it. Living machines! What was Aloyzo doing? | |||
| Post-Battle Description | |||
| The fight destroys the kitchen and much of its contents. You that all this is worth it to the errant wizard. You can now climb to the last level of the tower and secure it from it's artificially animated assailants. | |||
[edit] Part 3 - Workshop Apex
| Win/Loss | |||
|---|---|---|---|
| Victory Stars | Loss Stars | ||
| 2 | 6 | ||
| Enemies | Quantity | ||
| Bronze Golem | 1 | ||
| Pre-Battle Description | |||
| At the tower's apex is Aloyzo's master laboratory. The walls are lined with shelves of herbs, unguents and potions. This room is guarded by an enormous Bronze Golem. This mechanical monstrosity s a threat to magic, living creatures and the Cardhuntrian way of life. It must be smashed to pieces! | |||
| Post-Battle Description | |||
| The final battle destroys the laboratory completely. Both Aloyzo the wizard and local authorities are grateful for the player's successful efforts. With a sigh, Aloyzo swears a solemn oath never to dabble in the dark arts of technology again. He rewards you with what he can salvage from his ruined lab and pledges to assist you in your further adventures whenever he can. | |||


