White Skull Canyon
From Card Hunter Wiki
(Difference between revisions)
m (optimized adv images (png -> jpg), fixed descriptions, added hints) |
|||
| (2 intermediate revisions by one user not shown) | |||
| Line 3: | Line 3: | ||
| num_scenarios=2 | | num_scenarios=2 | ||
| level=1 | | level=1 | ||
| − | | splash_screen= | + | | splash_screen=Tutorial 4.jpg |
| − | | | + | | prereq1=TUTSHWT4 |
| − | | | + | | comp1=TUTSHWAD |
| − | + | ||
| − | + | ||
| − | + | ||
| − | + | ||
| − | + | ||
| − | + | ||
| reward1=Blessed Demon Claw | | reward1=Blessed Demon Claw | ||
| reward2=Amber Shards | | reward2=Amber Shards | ||
| Line 18: | Line 12: | ||
| number=1 | | number=1 | ||
| title=White Skull Gates | | title=White Skull Gates | ||
| − | | pre_description=Returning to White Skull Canyon you follow the winding dry riverbed until you come to a high wooden wall. | + | | pre_description=Returning to White Skull Canyon you follow the winding dry riverbed until you come to a high wooden wall. Suddenly, the gates are thrown open. Kobold Warriors rush forward, egged on by their High Priest, Ig-Gabig! |
| post_description=Victorious, you search the bodies. While your back is turned, Ig-Gabig's Feign Death enchantment dissipates and the shifty little Kobold priest slips away deeper into the lair. After him! | | post_description=Victorious, you search the bodies. While your back is turned, Ig-Gabig's Feign Death enchantment dissipates and the shifty little Kobold priest slips away deeper into the lair. After him! | ||
| − | | raw_map=White Skull Canyon Part1 Map. | + | | raw_map=White Skull Canyon Part1 Map.jpg |
| victory_stars=4 | | victory_stars=4 | ||
| loss_stars=4 | | loss_stars=4 | ||
| Line 27: | Line 21: | ||
| mob2=[[Kobold Warriors]] | | mob2=[[Kobold Warriors]] | ||
| mob2_quantity=2 | | mob2_quantity=2 | ||
| + | | hint1=The Kobolds' Weak Blocks can't block a Chop because it does too much damage. | ||
| + | | hint2=Did you remember to equip your Kobold Killer? | ||
| + | | hint3=Don't forget - attacking from behind evades Blocks! | ||
}} | }} | ||
| scenario2= | | scenario2= | ||
| Line 34: | Line 31: | ||
| pre_description=Pursuing the Kobold Priest, you corner him in his stinking hut. Now it i time for the final showdown with these murderous bandits. | | pre_description=Pursuing the Kobold Priest, you corner him in his stinking hut. Now it i time for the final showdown with these murderous bandits. | ||
| post_description=Searching through the much and bodies, you recover what treasure you can. The Kobolds are overthrown and put to flight. The villagers can rest well tonight. You are now a fully fledged adventurer! | | post_description=Searching through the much and bodies, you recover what treasure you can. The Kobolds are overthrown and put to flight. The villagers can rest well tonight. You are now a fully fledged adventurer! | ||
| − | | raw_map=White Skull Canyon Part2 Map. | + | | raw_map=White Skull Canyon Part2 Map.jpg |
| victory_stars=5 | | victory_stars=5 | ||
| loss_stars=4 | | loss_stars=4 | ||
| Line 41: | Line 38: | ||
| mob2=[[Kobold Warriors]] | | mob2=[[Kobold Warriors]] | ||
| mob2_quantity=3 | | mob2_quantity=3 | ||
| + | | hint1=Rush Ig-Gabig and deal with him first - otherwise he can heal up the other Kobolds. | ||
}} | }} | ||
}} | }} | ||
Latest revision as of 13:43, 11 August 2015
| Number of Scenarios | 2 |
| Guaranteed Reward for Completion | |
| Quests | |
| |
| Unlocked By | |
| Tunnels into Darkness | |
| Unlocks | |
| Caverns of the Troglodytes, Dungeon of the Lizard Priest, Highway Robbery, Randimar's Rarities, Ruby Demon Portal, The Wizard's Workshop | |
[edit] Part 1 - White Skull Gates
| Win/Loss | ||||
|---|---|---|---|---|
| Victory Stars | Loss Stars | |||
| 4 | 4 | |||
| Enemies | Quantity | |||
| Ig-Gabig | 1 | |||
| Kobold Warriors | 2 | |||
| Pre-Battle Description | ||||
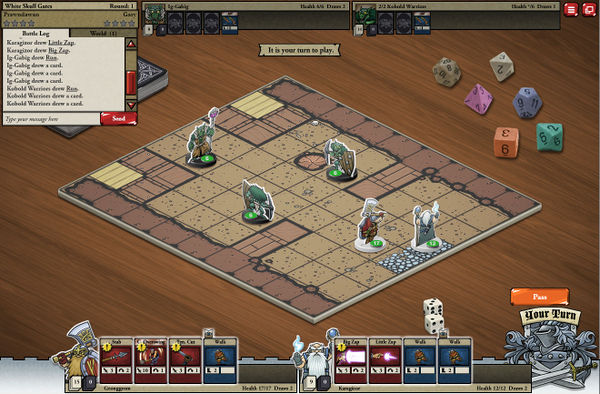
| Returning to White Skull Canyon you follow the winding dry riverbed until you come to a high wooden wall. Suddenly, the gates are thrown open. Kobold Warriors rush forward, egged on by their High Priest, Ig-Gabig! | ||||
| Post-Battle Description | ||||
| Victorious, you search the bodies. While your back is turned, Ig-Gabig's Feign Death enchantment dissipates and the shifty little Kobold priest slips away deeper into the lair. After him! | ||||
| Hints | ||||
| ||||
[edit] Part 2 - The Shaman's Hut
| Win/Loss | ||||
|---|---|---|---|---|
| Victory Stars | Loss Stars | |||
| 5 | 4 | |||
| Enemies | Quantity | |||
| Ig-Gabig | 1 | |||
| Kobold Warriors | 3 | |||
| Pre-Battle Description | ||||
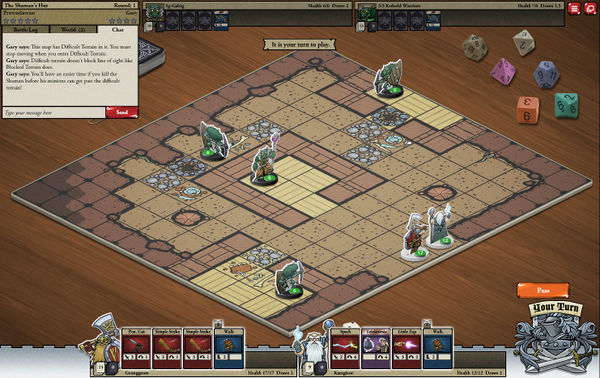
| Pursuing the Kobold Priest, you corner him in his stinking hut. Now it i time for the final showdown with these murderous bandits. | ||||
| Post-Battle Description | ||||
| Searching through the much and bodies, you recover what treasure you can. The Kobolds are overthrown and put to flight. The villagers can rest well tonight. You are now a fully fledged adventurer! | ||||
| Hints | ||||
| ||||


