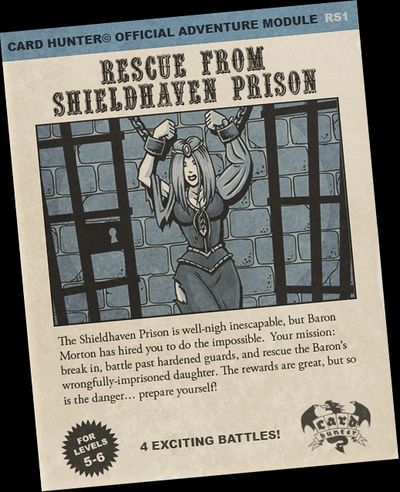
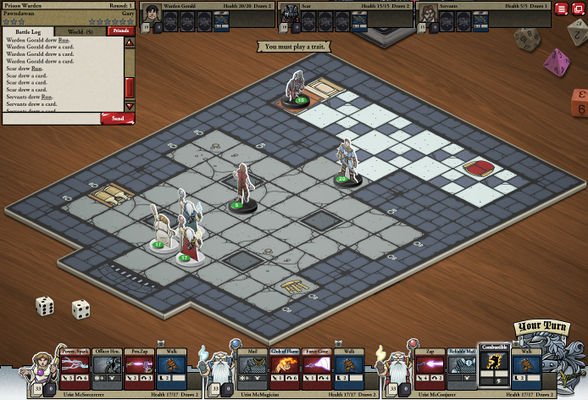
Rescue From Shieldhaven Prison
From Card Hunter Wiki
(Difference between revisions)
m (added hints + vp square info) |
|||
| (10 intermediate revisions by 4 users not shown) | |||
| Line 3: | Line 3: | ||
| num_scenarios=4 | | num_scenarios=4 | ||
| level=5 | | level=5 | ||
| − | | splash_screen=Rescue | + | | splash_screen=Rescue.jpg |
| − | | | + | | quest1 = {{NoDeathsQuest}} |
| + | | quest2 = {{1HpQuest}} | ||
| + | | quest3 = {{DrawbackQuest}} | ||
| + | | prereq1=ADVLVL05 | ||
| + | | comp1=ADVLVL06 | ||
| + | | comp2=ADVLVL07 | ||
| + | | comp3=UNLKCOST | ||
| scenario1= | | scenario1= | ||
{{Scenario | {{Scenario | ||
| Line 11: | Line 17: | ||
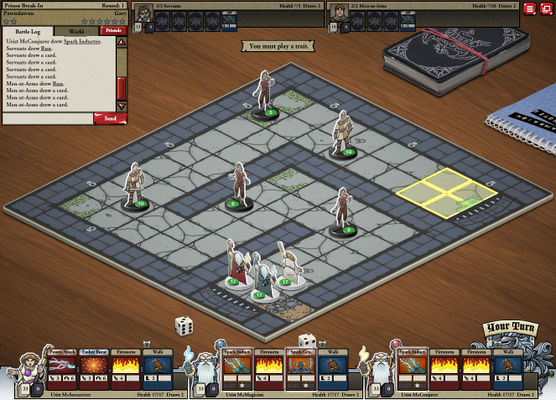
| pre_description=By bribing a groundskeeper, you gain entry to the prison via a conveniently unguarded drain cover. Once inside, you set forth to rescue Baron Morton's Daughter, Griselda, from this dank nightmare. Your first obstacle will be a guard lecturing some obnoxious servants... | | pre_description=By bribing a groundskeeper, you gain entry to the prison via a conveniently unguarded drain cover. Once inside, you set forth to rescue Baron Morton's Daughter, Griselda, from this dank nightmare. Your first obstacle will be a guard lecturing some obnoxious servants... | ||
| post_description=With the guards defeated, you can now venture further inside the prison. A trap door at the end of the corridor is the only way forward. Loud voices can be heard from beyond. | | post_description=With the guards defeated, you can now venture further inside the prison. A trap door at the end of the corridor is the only way forward. Loud voices can be heard from beyond. | ||
| − | | raw_map=Rescue From Shieldhaven Prison Part1 Map. | + | | raw_map=Rescue From Shieldhaven Prison Part1 Map.jpg |
| victory_stars=2 | | victory_stars=2 | ||
| loss_stars=6 | | loss_stars=6 | ||
| − | | mob1=[[ | + | | num_victory_squares=4 |
| + | | mob1=[[Human Servant|Servants]] | ||
| mob1_quantity=3 | | mob1_quantity=3 | ||
| − | | mob2=[[ | + | | mob2=[[Men at Arms|Men at Arms]] |
| mob2_quantity=2 | | mob2_quantity=2 | ||
| − | | hint1= | + | | hint1=Killing the servants prevents them from playing their Raise the Alarm card and drawing more cards. |
| − | | hint2= | + | | hint2=You don't score any Victory Stars for killing servants so you don't have to kill them to win. |
| + | | hint3=You need to rush the yellow Victory Squares to stop Gary winning by occupying them. | ||
}} | }} | ||
| scenario2= | | scenario2= | ||
| Line 25: | Line 33: | ||
| number=2 | | number=2 | ||
| title=Prison Guardhouse | | title=Prison Guardhouse | ||
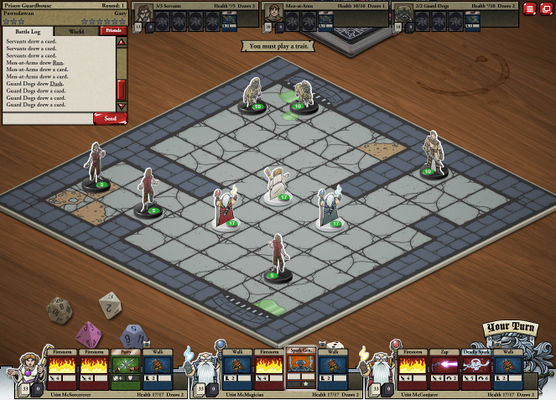
| − | | pre_description=The prison is guarded by a brutish | + | | pre_description=The prison is guarded by a brutish company of men-at-arms who dedicate their lives to administering summary justice to their guests. During their time off duty they reside here in the Guard House, to play cards and drink rum. But the real danger here is the guard dogs. These cowardly beasts are capable of quickly taking down the most capable warrior if they are allowed to attack from behind. |
| post_description=With the guards taken care of, you can now proceed into the prison in search of Griselda. Frenzied barking can be heard from up ahead. More of those accursed canines must be dealt with, and quickly! | | post_description=With the guards taken care of, you can now proceed into the prison in search of Griselda. Frenzied barking can be heard from up ahead. More of those accursed canines must be dealt with, and quickly! | ||
| − | | raw_map=Rescue From Shieldhaven Prison Part2 Map. | + | | raw_map=Rescue From Shieldhaven Prison Part2 Map.jpg |
| victory_stars=3 | | victory_stars=3 | ||
| loss_stars=6 | | loss_stars=6 | ||
| − | | mob1=[[ | + | | mob1=[[Human Servant|Servants]] |
| mob1_quantity=3 | | mob1_quantity=3 | ||
| − | | mob2=[[ | + | | mob2=[[Men at Arms|Men at Arms]] |
| mob2_quantity=1 | | mob2_quantity=1 | ||
| − | | mob3=[[ | + | | mob3=[[Guard Dog|Guard Dog]] |
| mob3_quantity=2 | | mob3_quantity=2 | ||
| hint1=Guard dogs can do a large amount of damage from the rear. Be careful with your facing! | | hint1=Guard dogs can do a large amount of damage from the rear. Be careful with your facing! | ||
| Line 42: | Line 50: | ||
| number=3 | | number=3 | ||
| title=Prison Dog Yard | | title=Prison Dog Yard | ||
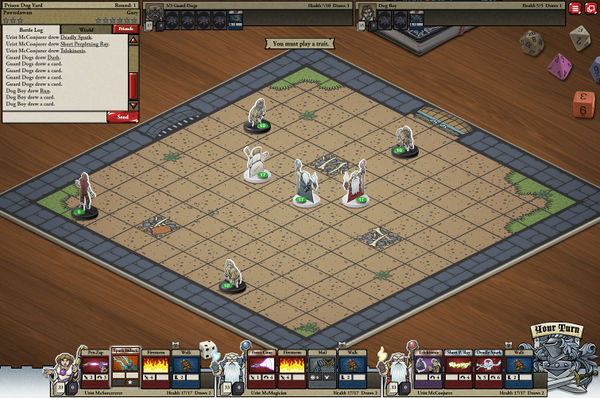
| − | | pre_description= | + | | pre_description=The Dog Yard is home to a pack of three starving guard dogs who have been trained to attack strangers on sight. They are tended to by a feral urchin, and though incapable of speech, he has the audacity to accost you. Make this cur and his charges share the same fate! |
| post_description=Crossing the Dog Yard brings you to the entrance of the dread Prison Catacombs, where the majority of the prisoners are held. Griselda is surely inside. | | post_description=Crossing the Dog Yard brings you to the entrance of the dread Prison Catacombs, where the majority of the prisoners are held. Griselda is surely inside. | ||
| − | | raw_map=Rescue From Shieldhaven Prison Part3 Map. | + | | raw_map=Rescue From Shieldhaven Prison Part3 Map.jpg |
| victory_stars=3 | | victory_stars=3 | ||
| loss_stars=6 | | loss_stars=6 | ||
| − | | mob1=[[ | + | | mob1=[[Guard Dog|Guard Dog]] |
| mob1_quantity=3 | | mob1_quantity=3 | ||
| − | | mob2=[[ | + | | mob2=[[Human Servant|Dog Boy]] |
| mob2_quantity=1 | | mob2_quantity=1 | ||
| hint1=Dog Boy doesn't give any victory points, so like the Servants killing him is optional. | | hint1=Dog Boy doesn't give any victory points, so like the Servants killing him is optional. | ||
| + | | hint2=Try to avoid letting the dogs get behind you where their Cowardly Attack will do extra damage. | ||
}} | }} | ||
| scenario4= | | scenario4= | ||
| Line 59: | Line 68: | ||
| pre_description=No one has escaped the prison in twenty years. Imagine Warden Gorald's surprise to find that someone has broken in! He will seek retribution for this outrage. He has a small retinue of servants and a fanatically loyal hound named Scar. Scar wears a bespoke chainmail suit, making him even tougher to harm than the dogs you have faced thus far. You hear Griselda's faint cries for help from nearby. For the house Morton! To battle! | | pre_description=No one has escaped the prison in twenty years. Imagine Warden Gorald's surprise to find that someone has broken in! He will seek retribution for this outrage. He has a small retinue of servants and a fanatically loyal hound named Scar. Scar wears a bespoke chainmail suit, making him even tougher to harm than the dogs you have faced thus far. You hear Griselda's faint cries for help from nearby. For the house Morton! To battle! | ||
| post_description=The defeated Warden Gorald has a set of keys on his belt which open the cells throughout the prison. You discover Griselda in a cell nearby, unmolested but bedraggled. She is overcome with relief at her rescue and promises great rewards upon her safe return to her father. Rewards you have truly earned! | | post_description=The defeated Warden Gorald has a set of keys on his belt which open the cells throughout the prison. You discover Griselda in a cell nearby, unmolested but bedraggled. She is overcome with relief at her rescue and promises great rewards upon her safe return to her father. Rewards you have truly earned! | ||
| − | | raw_map=Rescue From Shieldhaven Prison Part4 Map. | + | | raw_map=Rescue From Shieldhaven Prison Part4 Map.jpg |
| victory_stars=3 | | victory_stars=3 | ||
| loss_stars=6 | | loss_stars=6 | ||
| − | | mob1=[[ | + | | mob1=[[Warden Gorald|Warden Gorald]] |
| mob1_quantity=1 | | mob1_quantity=1 | ||
| − | | mob2=[[ | + | | mob2=[[Armored Dog|Scar]] |
| mob2_quantity=1 | | mob2_quantity=1 | ||
| − | | mob3=[[ | + | | mob3=[[Human Servant|Servants]] |
| mob3_quantity=1 | | mob3_quantity=1 | ||
| + | | hint1=Warden Gorald has a lot of Parries. Try to attack him from behind or use Magic attacks to avoid them. | ||
}} | }} | ||
}} | }} | ||
Latest revision as of 14:16, 7 August 2015
| Number of Scenarios | 4 |
| Quests | |
| |
| Unlocked By | |
| Dungeon of the Lizard Priest, Highway Robbery, Lair of the Trog Wizard, Ruby Demon Portal | |
| Unlocks | |
| Diamonds of the Kobolds, Kyburz Market, The Defense of Woodhome Beneath the Frozen Earth, Forest of Souls, Valley of Tezkal Cuthbert's Costumes | |
Contents |
[edit] Part 1 - Prison Break-In
| Win/Loss | |||||
|---|---|---|---|---|---|
| Victory Stars | Loss Stars | Victory Squares | |||
| 2 | 6 | 4 | |||
| Enemies | Quantity | ||||
| Servants | 3 | ||||
| Men at Arms | 2 | ||||
| Pre-Battle Description | |||||
| By bribing a groundskeeper, you gain entry to the prison via a conveniently unguarded drain cover. Once inside, you set forth to rescue Baron Morton's Daughter, Griselda, from this dank nightmare. Your first obstacle will be a guard lecturing some obnoxious servants... | |||||
| Post-Battle Description | |||||
| With the guards defeated, you can now venture further inside the prison. A trap door at the end of the corridor is the only way forward. Loud voices can be heard from beyond. | |||||
| Hints | |||||
| |||||
[edit] Part 2 - Prison Guardhouse
| Win/Loss | ||||
|---|---|---|---|---|
| Victory Stars | Loss Stars | |||
| 3 | 6 | |||
| Enemies | Quantity | |||
| Servants | 3 | |||
| Men at Arms | 1 | |||
| Guard Dog | 2 | |||
| Pre-Battle Description | ||||
| The prison is guarded by a brutish company of men-at-arms who dedicate their lives to administering summary justice to their guests. During their time off duty they reside here in the Guard House, to play cards and drink rum. But the real danger here is the guard dogs. These cowardly beasts are capable of quickly taking down the most capable warrior if they are allowed to attack from behind. | ||||
| Post-Battle Description | ||||
| With the guards taken care of, you can now proceed into the prison in search of Griselda. Frenzied barking can be heard from up ahead. More of those accursed canines must be dealt with, and quickly! | ||||
| Hints | ||||
| ||||
[edit] Part 3 - Prison Dog Yard
| Win/Loss | ||||
|---|---|---|---|---|
| Victory Stars | Loss Stars | |||
| 3 | 6 | |||
| Enemies | Quantity | |||
| Guard Dog | 3 | |||
| Dog Boy | 1 | |||
| Pre-Battle Description | ||||
| The Dog Yard is home to a pack of three starving guard dogs who have been trained to attack strangers on sight. They are tended to by a feral urchin, and though incapable of speech, he has the audacity to accost you. Make this cur and his charges share the same fate! | ||||
| Post-Battle Description | ||||
| Crossing the Dog Yard brings you to the entrance of the dread Prison Catacombs, where the majority of the prisoners are held. Griselda is surely inside. | ||||
| Hints | ||||
| ||||
[edit] Part 4 - Prison Warden
| Win/Loss | ||||
|---|---|---|---|---|
| Victory Stars | Loss Stars | |||
| 3 | 6 | |||
| Enemies | Quantity | |||
| Warden Gorald | 1 | |||
| Scar | 1 | |||
| Servants | 1 | |||
| Pre-Battle Description | ||||
| No one has escaped the prison in twenty years. Imagine Warden Gorald's surprise to find that someone has broken in! He will seek retribution for this outrage. He has a small retinue of servants and a fanatically loyal hound named Scar. Scar wears a bespoke chainmail suit, making him even tougher to harm than the dogs you have faced thus far. You hear Griselda's faint cries for help from nearby. For the house Morton! To battle! | ||||
| Post-Battle Description | ||||
| The defeated Warden Gorald has a set of keys on his belt which open the cells throughout the prison. You discover Griselda in a cell nearby, unmolested but bedraggled. She is overcome with relief at her rescue and promises great rewards upon her safe return to her father. Rewards you have truly earned! | ||||
| Hints | ||||
| ||||
